Dream InsightSocial Video AI Report
Creative Intelligence Report
Turn Raw Social Video Into Usable Creative Insight
这份页面不是后台导出表,而是一份适合运营、投手和剪辑同事直接复盘的网页式素材报告。重点看:前 3 秒有没有抓手,证明动作是否足够,后续复剪该怎么改。
Hook Type
教程演示型 Hook
加宽带可继续放大。当前最有价值的点是:镜前演示自带生活感,比较贴合同类 UGC 观看语境。;最需要优先修的点是:模型内容分不低,但真实完播偏弱,说明节奏感可能还是偏长或前几秒停留抓力不足。;下一步建议:前 3 秒补一句更短的强字幕,比如“Go watch this video so”,优先把痛点、结果或题材关键词变成一眼能扫懂的文案。
READY TO REUSE
完整口播脚本
Go watch this video
so that you can see exactly how to take a brand new wig,
how I prep my hair,
and how I make that lace front look the most natural.
That's on what my process is to getting my hair prepped
and ready to wear a wig. So I'm gonna show you that process right now,
some of my favorite tips and tricks,
my favorite wig grip. And then
I'm gonna go ahead and show you
exactly what I would do to a brand new wig
to make her feel more natural for me.
Also, a little disclaimer is you do what works best for you.
Just because I'm sharing what works best for me
doesn't mean it's gonna work best for you.
But I always get asked on different tips and tricks,
so I'm gonna share those with you guys.
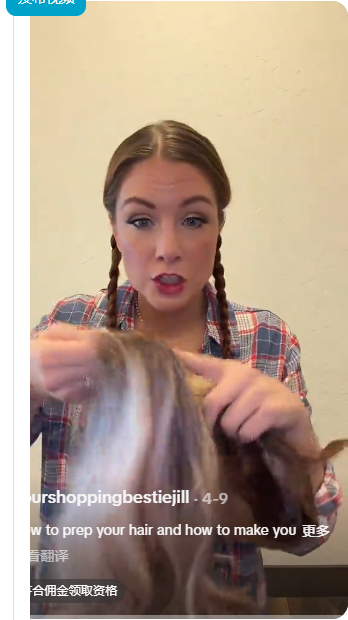
I put my hair in two little braids.
That's because I still have a good amount of bio hair.
I don't want a big lump in the back of my head.
So these make it really easy to kind of
fold them over and make them a little flatter.
I do use the Dream Lover, the extended one.
This is by far my favorite wig grip.
I actually put it on my forehead.
Yes, on my forehead,
cause that's gonna help with slippage.
And then I move it up. I'm going to pull up my braids.
I'm also gonna kind of overlap those braids
so it Kind of has a little bit of a stopping point.
You guys can see this braid is right there.
It's gonna have a little bit of a stopping point
to keep it from slipping.
I'm going to then fold these over and just tuck these in.
And I push this part back until you start.
Start to see your hairline right there.
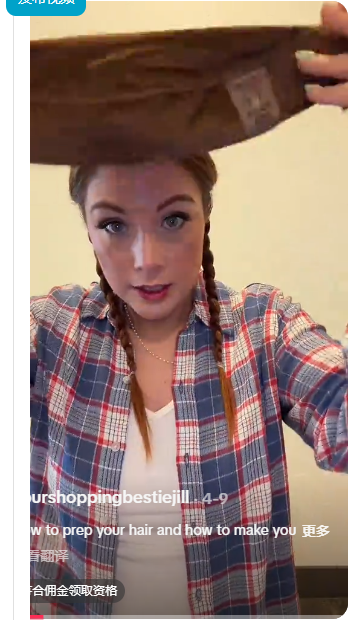
And then I'm going to put my wig cap over the top.
Why do I put my wig cap over the top?
It's the only way I can get my wig cap to stay.
And it also protects my bio hair
and keeps everything from moving and grooving back there.
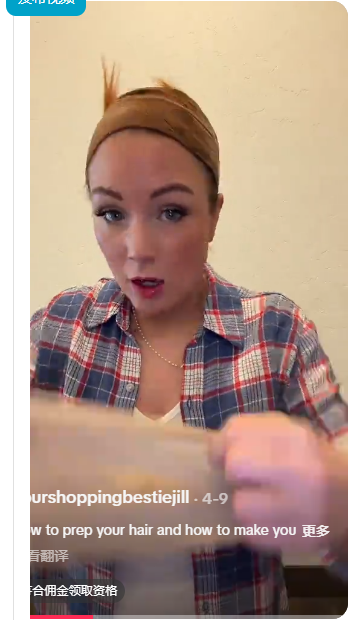
Keeps it all in order. So now I'm ready to put my wig on.
But I have a new wig. I just cut the lace
and I wanna show you exactly what I do
to get her to look the most natural
at the hairline.
Alright, I just popped on a wig.
I'm going to pull this down.
Gonna show you exactly how.
I could just leave it like this,
but I'm gonna show you exactly how I get this part
to look the most natural for me.
Moving to the bathroom cause I'm gonna do a little heat styling.
So what I'm actually gonna do is first
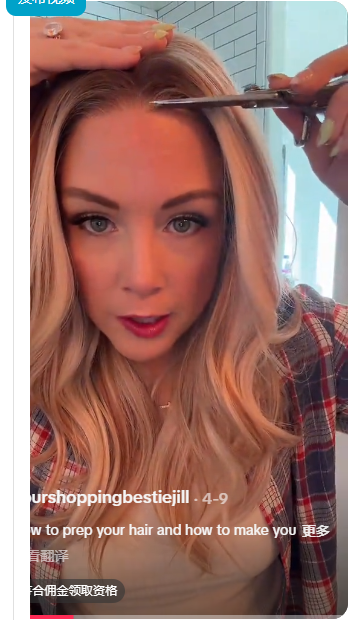
I'm gonna go in and cut a little bit more of this hairline off.
This is just gonna be a little bit more natural for me.
This is what I Do with all of my wigs until they look the most natural
right up there. Now that I've done that,
I'm going to give her a part.
I want her to stay parted like this.
And I also, like,
I don't normally wear my hair away from my face like this,
so I'm actually gonna pull some of these forward,
and I find that it makes it just look a little bit more natural,
and also helps hide that lace a little bit more.
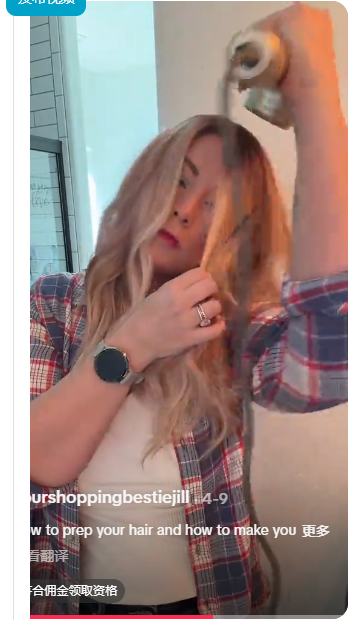
So I'm gonna put my blow dryer on hot heat,
bring it to red,
and I'm just gonna pull a chunk like this forward.
Okay. And then I'm gonna change it to cold.
We're gonna fully cool it right there.
See how that just lays a little bit more natural?
I'm gonna do the same thing over here.
I'm gonna take kind of a chunk like this,
pull it forward, change this to hot,
and get it cool
till it's fully cool.
There we go. And I have one last tip and trick
thing I'm gonna do is I'm gonna take some of my under eye makeup,
and I'm gonna use a really kind of dense eyeshadow brush,
and I'm going to just tap this right here on my hairline
into that part.
That is gonna make her feel a little bit more natural.
And sometimes, depending on where my part is,
I'll go back and do a little bit more right in here as well.
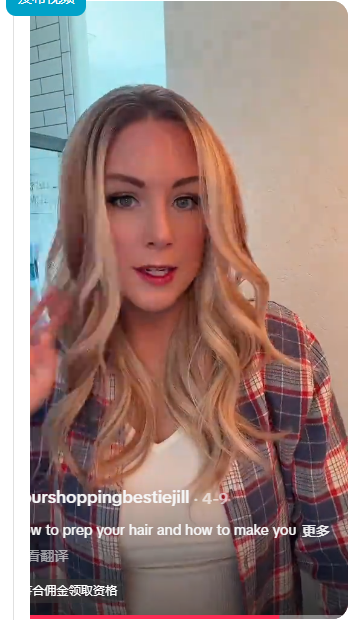
And this just makes that look more like my natural hairline.
So hopefully this was helpful.
Those are some of the tips and tricks that I do
to make my lace fronts look the most natural.
二次判断
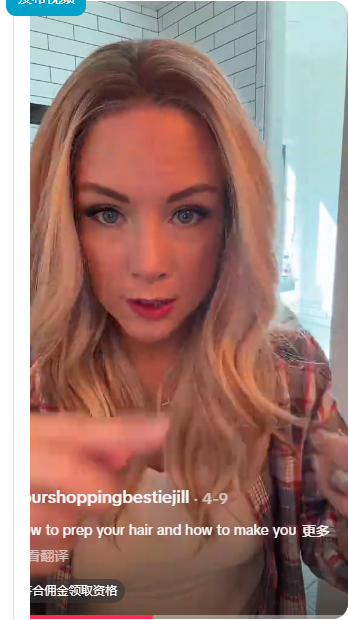
带入 Agent 继续分析广告侧:2s 50.96% / 6s 28.32% / CTR 3.87% / ROI 0.98 / 13 单;00:01 就出现产品画面,动作是“presenter adjusts wig and shows hairline”,用户很快能知道卖点指向。
前 3 秒关键信息主要靠口播,没有同步强字幕,静音刷到时的停留效率会打折。
保留当前开头抓手,补更强的测试、前后对比或结果验证,让点击进一步接到转化。
规则判断用于快速复盘;进入 Agent 后可调用外部模型继续结合画面、脚本与市场语境追问。
Hook 复盘
教程演示型 Hook前 3 秒核心判断
当前判为「教程演示开头」。判断只参考开头 3-5 秒的时间轴转写和首屏 OCR,避免后段证明动作误判成 Hook。;开头任务是进入步骤教学或演示流程。;开头口播/字幕依据:Go watch this video so that you can see exactly how to take a brand new wig, how;产品在开头很早出现,适合直接建立广告理解。;后段可承接的证明动作:发际线近景展示、close-up fit demonstration、上头佩戴过程演示
这条素材做得好的点
- 加宽带 在 1.0 秒内就明确露出,前几秒就完成品类识别,适合 TikTok 快节奏带货素材。
- 已经出现了可用证明动作:发际线近景展示、close-up fit demonstration、上头佩戴过程演示。
- 镜前演示自带生活感,比较贴合同类 UGC 观看语境。
- 前 3 秒教学路径明确
- 产品露出足够早
最需要优先修的点
- 前 3 秒关键信息主要靠口播,没有同步强字幕,静音刷到时的停留效率会打折。
- 广告侧已经有花费但 ROI 偏弱,说明当前内容还没有把点击和成交真正连起来。
- 点击率不差但转化偏弱,更像是开头能吸引人,但产品信任或成交引导还不够。
- 模型内容分不低,但真实完播偏弱,说明节奏感可能还是偏长或前几秒停留抓力不足。
- CTA 识别偏弱,用户看完后未必知道该做什么动作。
时间轴拆解
按片段聚合展示
00:00-00:07
开头 Hook
开头问题抛出
Go watch this video so that you can see exactly how to take a brand new wig, how I prep my hair, and how I make that lace front look the most natural.
00:07-00:13
开头 Hook
开头问题抛出
That's on what my process is to getting my hair prepped and ready to wear a wig. So I'm gonna show you that process right now,
00:13-00:20
开头 Hook
开头问题抛出
some of my favorite tips and tricks, my favorite wig grip. And then I'm gonna go ahead and show you exactly what I would do to a brand new wig
00:20-00:26
开头 Hook
开头问题抛出
to make her feel more natural for me. Also, a little disclaimer is you do what works best for you. Just because I'm sharing what works best for me
00:26-00:31
问题铺垫
产品结构与使用背景
doesn't mean it's gonna work best for you. But I always get asked on different tips and tricks, so I'm gonna share those with you guys.
00:31-00:36
问题铺垫
产品结构与使用背景
I put my hair in two little braids. That's because I still have a good amount of bio hair. I don't want a big lump in the back of my head.
00:36-00:42
问题铺垫
产品结构与使用背景
So these make it really easy to kind of fold them over and make them a little flatter. I do use the Dream Lover, the extended one.
00:42-00:48
问题铺垫
产品结构与使用背景
This is by far my favorite wig grip. I actually put it on my forehead. Yes, on my forehead, cause that's gonna help with slippage.
00:48-00:55
问题铺垫
产品结构与使用背景
And then I move it up. I'm going to pull up my braids. I'm also gonna kind of overlap those braids so it Kind of has a little bit of a stopping point.
00:56-01:06
问题铺垫
产品结构与使用背景
You guys can see this braid is right there. It's gonna have a little bit of a stopping point to keep it from slipping. I'm going to then fold these over and just tuck these in.
01:06-01:13
问题铺垫
产品结构与使用背景
And I push this part back until you start. Start to see your hairline right there. And then I'm going to put my wig cap over the top.
01:13-01:21
问题铺垫
产品结构与使用背景
Why do I put my wig cap over the top? It's the only way I can get my wig cap to stay. And it also protects my bio hair and keeps everything from moving and grooving back there.
01:21-01:28
证明展示
上身效果与稳定性展示
Keeps it all in order. So now I'm ready to put my wig on. But I have a new wig. I just cut the lace and I wanna show you exactly what I do
01:28-01:37
证明展示
上身效果与稳定性展示
to get her to look the most natural at the hairline. Alright, I just popped on a wig. I'm going to pull this down. Gonna show you exactly how.
01:37-01:44
证明展示
上身效果与稳定性展示
I could just leave it like this, but I'm gonna show you exactly how I get this part to look the most natural for me. Moving to the bathroom cause I'm gonna do a little heat styling.
01:44-01:51
证明展示
上身效果与稳定性展示
So what I'm actually gonna do is first I'm gonna go in and cut a little bit more of this hairline off. This is just gonna be a little bit more natural for me.
01:51-01:58
证明展示
上身效果与稳定性展示
This is what I Do with all of my wigs until they look the most natural right up there. Now that I've done that, I'm going to give her a part.
01:58-02:05
证明展示
上身效果与稳定性展示
I want her to stay parted like this. And I also, like, I don't normally wear my hair away from my face like this, so I'm actually gonna pull some of these forward,
02:05-02:10
证明展示
上身效果与稳定性展示
and I find that it makes it just look a little bit more natural, and also helps hide that lace a little bit more. So I'm gonna put my blow dryer on hot heat,
02:11-02:21
证明展示
上身效果与稳定性展示
bring it to red, and I'm just gonna pull a chunk like this forward. Okay. And then I'm gonna change it to cold.
02:21-02:30
证明展示
上身效果与稳定性展示
We're gonna fully cool it right there. See how that just lays a little bit more natural?
02:30-02:43
证明展示
上身效果与稳定性展示
I'm gonna do the same thing over here. I'm gonna take kind of a chunk like this, pull it forward, change this to hot, and get it cool
02:45-02:54
结果强化
结果强化与补充说明
till it's fully cool. There we go. And I have one last tip and trick
02:54-03:00
结果强化
价格与 CTA 收束
thing I'm gonna do is I'm gonna take some of my under eye makeup, and I'm gonna use a really kind of dense eyeshadow brush,
03:00-03:07
结果强化
结果强化与补充说明
and I'm going to just tap this right here on my hairline into that part.
03:10-03:18
结果强化
结果强化与补充说明
That is gonna make her feel a little bit more natural. And sometimes, depending on where my part is, I'll go back and do a little bit more right in here as well.
03:22-03:28
结尾引导
收尾总结
And this just makes that look more like my natural hairline. So hopefully this was helpful. Those are some of the tips and tricks that I do
03:28-03:30
结尾引导
收尾总结
to make my lace fronts look the most natural.
关键帧画面拆解
真实截图优先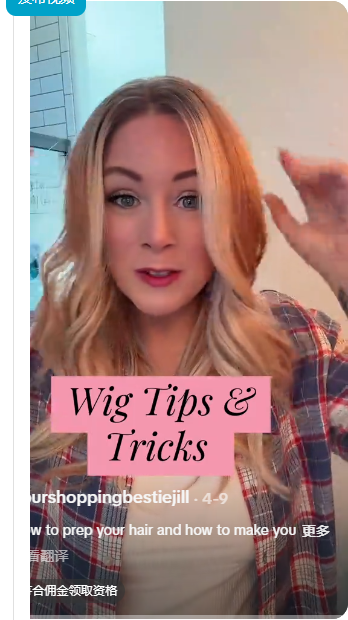
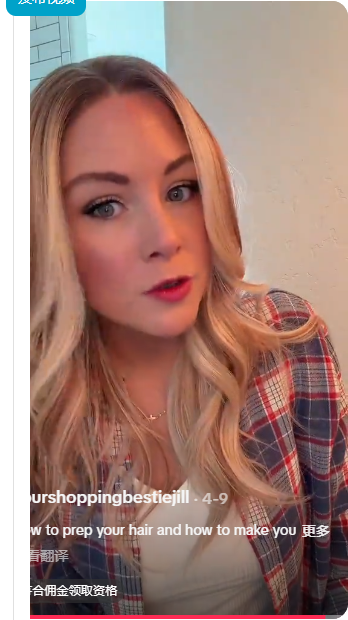
定向优化建议
结合画面、口播与市场逻辑可直接交给剪辑的建议
- 前 3 秒补一句更短的强字幕,比如“Go watch this video so”,优先把痛点、结果或题材关键词变成一眼能扫懂的文案。
- 保留镜前真人演示,但再补一个更近的局部镜头,避免全程停留在中景讲解。
- 既然视频强调发际线效果,建议单独补 1 秒发际线近景,并用字幕点明自然度。
- 当前有教程感,建议在字幕里补步骤词,提升“边看边学”的节奏感。
- 这条有明显价格锚点,建议继续强化“低门槛入手 + 真实好用”的表达,并把 加宽带 的核心差异点更早抛出来。
- 保留当前 Hook,不要先动开头;优先补证明动作、价格锚点或更明确的购买理由,把点击往成交推。
- 缩短前 5 秒解释时长,把最能证明结果的镜头提到更前面,减少铺垫型口播。
- 结尾补一个明确 CTA:例如“点购物车看颜色”或“链接在下方”,不要只停在展示效果。
复剪价值判断
是否值得复剪:unsure
原投放状态:是
测试方式识别
主表标签 + 视频二次识别最终识别结果
主表原始测试方式
视频二次推断
视觉资产分析
不是只看截图,而是判断这帧为什么有用CTA 分析
成交引导是否清楚、是否带优惠和紧迫感
CTA 文案
未识别到明确 CTA
CTA 出现时间
-
CTA 类型
未识别
CTA 强度
weak
是否有优惠
是
是否有紧迫感
否
产品露出分析
不只是出现没出现,而是出现得够不够早、够不够清楚
产品首次出现
00:01
总露出时长
13.50 秒
产品近景次数
9
产品使用清晰度
高
产品露出评分
100
Logo 可见
否
包装可见
否
价格可见
否
Commercial Reality Check
内容表现之外,再看真实成交反馈数据侧结论
加宽带已经出现早期成交信号。 最近一期 GMV 约 32.69,订单 2,滚动三期 GMV 约 200.72。 最近一期交易表现低于前期均值,可能出现疲劳或素材老化。 当前退款件数占成交件数约 0.00%。
趋势判断
趋势:falling
滚动周期:3 个阶段
最近一期
0527-0623
最近一期 GMV
$32.69
最近一期订单
2
滚动三期 GMV
$200.72
滚动三期订单
12
退款件数占比
0.00%
佣金占比
9.50%
交易判断
early_signal
分周期交易明细
| 周期 | GMV | 订单数 | 成交件数 | 退款金额 | 退款件数 |
|---|---|---|---|---|---|
| 0326-0425 | $83.13 | 5 | 5 | $0.00 | |
| 0426-0526 | $84.90 | 5 | 5 | $0.00 | |
| 0527-0623 | $32.69 | 2 | 2 | $0.00 |
Ad Performance Layer
人工拉取广告数据后写入的真实表现层数据侧判断
这条素材在广告投放侧已有真实信号:ROI 0.98,CTR 3.87%,转化率 2.77%,完播率 0.00%。 点击层面不差,但转化偏弱,更像是 Hook 能拉人、后链路说服力不足。 加宽带在手动广告数据里也有商品级基准:累计营收 500,659.90,订单 29795,ROI 4.20。 对照商品级基准看,这条视频还有继续提升空间,重点应放在证明动作和转化引导。
数据来源说明
- 创意类型:联盟批量授权
- 视频来源:-
- 投放状态:已授权
- 发布时间:2026-04-08
- 商品基准分类:wide_band_video_perf
- 商品基准名称:加宽带
视频广告 ROI
0.98
广告花费
$226.42
广告收入
$220.94
订单数
13
曝光
12128
点击
469
CTR
3.87%
转化率
2.77%
2s 留存
50.96%
6s 留存
28.32%
25% 播放率
0.00%
50% 播放率
0.00%
75% 播放率
0.00%
完播率
0.00%
商品基准 ROI
4.20
商品基准营收
$500,659.90
商品基准订单
29795
商品平均下单成本
$4.00
表现归因与下一步动作
把内容判断翻译成更可执行的动作建议表现归因
当前判断:当前已有正向信号,值得继续优化
- 前 3 秒教学路径明确
- 产品露出足够早
- 有明确证明动作
- 真人生活感较强
- 价格或优惠表达有记忆点
- 测试方式具体,便于用户快速建立信任
- 展示路径完整,用户更容易理解产品怎么用
图文证据
- 00:01 就出现产品画面,动作是“presenter adjusts wig and shows hairline”,用户很快能知道卖点指向。
- 中段已经出现 发际线近景展示、close-up fit demonstration,说明这条视频不是只讲卖点,而是有在给用户看证据。
- 前 3 秒口播重点是“Go watch this video so that you can see exactly how to...”,这直接决定了用户第一反应更像在接收痛点、结果还是教程。
主要拖累点
- CTA 信号偏弱
- 高点击但转化承接偏弱
数据反馈
- 广告侧真实信号:ROI 0.98、CTR 3.87%、转化率 2.77%、完播率 0.00%。
- 这组数据更像“开头能吸引点击,但信任或购买理由没完全接住”。
下一步动作
建议动作:补证明镜头
处理优先级:高,建议优先处理
具体做法:保留当前开头抓手,补更强的测试、前后对比或结果验证,让点击进一步接到转化。
为什么先做这个
当前更像“能吸引点击进来,但还没完全说服下单”,所以这一步不是换题材,而是补更硬的证明镜头。
历史相似参考样本
把当前视频和已沉淀素材库做对照,避免建议只停留在模板话术
7611986136356965663
相似度 110
教程演示型 Hook
7611986136356965663
相似度 110
教程演示型 Hook
为什么相似
共同命中的展示/测试方式是:展示发际线、展示穿戴过程、扯头、梳头;Hook 结构同为 tutorial,但这只作为辅助参考,不等同于同一种创意。;同属 加宽带,用户理解成本接近。;产品首次露出节奏接近,相差约 1.0 秒。;历史样本开头信息是:I'm gonna show you exactly what I do to secure my wigs
可以借鉴什么
开头用的是“I'm gonna show you exactly what I do to secure my wigs”,可以参考它先抛出具体场景/感受,而不是只报产品名;可借鉴的动作是“甩头、梳头、展示穿戴过程”,重点看动作结果有没有被镜头拍清楚;已经出现证明动作:发际线近景展示、强调稳固效果、结构细节展示。
差异化提醒
相似样本只提供参考方向,当前视频仍要根据自己的首帧、口播和产品露出位置做差异化。
画面参考点
开头就能让用户知道卖什么,首屏识别成本低,适合做前 3 秒抓手。
内容评分100
UGC 真实感84
建议动作补证明镜头
7610509716673891598
相似度 110
教程演示型 Hook
7610509716673891598
相似度 110
教程演示型 Hook
为什么相似
共同命中的展示/测试方式是:展示穿戴过程、扯头、梳头;Hook 结构同为 tutorial,但这只作为辅助参考,不等同于同一种创意。;同属 加宽带,用户理解成本接近。;产品首次露出节奏接近,相差约 0.0 秒。;历史样本开头信息是:Let me show y'all how easy is to get your hair ready for work. Okay,
可以借鉴什么
开头用的是“Let me show y'all how easy is to get your hair ready for work. Okay,”,可以参考它先抛出具体场景/感受,而不是只报产品名;可借鉴的动作是“扯头、展示穿戴过程、梳头”,重点看动作结果有没有被镜头拍清楚;已经出现证明动作:close-up fit demonstration、上头佩戴过程演示。
差异化提醒
相似样本只提供参考方向,当前视频仍要根据自己的首帧、口播和产品露出位置做差异化。
画面参考点
开头就能让用户知道卖什么,首屏识别成本低,适合做前 3 秒抓手。
内容评分94
UGC 真实感84
建议动作补证明镜头
7521447933686861111
相似度 105
教程演示型 Hook
7521447933686861111
相似度 105
教程演示型 Hook
为什么相似
共同命中的展示/测试方式是:展示穿戴过程、扯头、梳头;Hook 结构同为 tutorial,但这只作为辅助参考,不等同于同一种创意。;同属 加宽带,用户理解成本接近。;产品首次露出节奏接近,相差约 0.0 秒。;历史样本开头信息是:when it comes to securing your wig everybody's a little bit different but I'm gonna show y
可以借鉴什么
开头用的是“when it comes to securing your wig everybody's a little bit different ”,可以参考它先抛出具体场景/感受,而不是只报产品名;可借鉴的动作是“甩头、扯头、梳头”,重点看动作结果有没有被镜头拍清楚;已经出现证明动作:佩戴舒适度证明、结构细节展示、close-up fit demonstration。
差异化提醒
相似样本只提供参考方向,当前视频仍要根据自己的首帧、口播和产品露出位置做差异化。
画面参考点
开头就能让用户知道卖什么,首屏识别成本低,适合做前 3 秒抓手。
内容评分95
UGC 真实感84
建议动作继续放量
打法规则库引用
把单条素材放回 172 条样本沉淀出的规则里校准
样本数
505
高质量样本
305
强证据样本
418
3秒内产品露出率
100.0%
hook_first_3s
前 3 秒要同时解决看懂和想看
规则证据
- 样本中 505/505 条可判定产品露出的素材在 3 秒内露出产品。
- 高频拖累项包含:前 3 秒抓手还不够集中, 证明动作不够强, CTA 信号偏弱。
执行建议
- 不要只靠口播解释,首屏要用字幕或画面直接表达痛点、结果或测试动作。
- 如果产品早露出但留存弱,优先补强第一句话和首帧封面,而不是只加结尾 CTA。
proof_action
防滑类素材必须有可视化证明动作
规则证据
- 高频测试方式包括:展示穿戴过程, 扯头, 颜色选择, 梳头, 甩头, 展示发际线。
- 高频优势项包括:真人生活感较强, 展示路径完整,用户更容易理解产品怎么用, 产品露出足够早, 测试方式具体,便于用户快速建立信任。
执行建议
- 甩头、扯头、梳头、展示发际线、展示穿戴过程要尽量出现在中前段。
- 证明动作不要只说,要让用户看到动作结果,比如拉扯后不移位、梳头后发际线自然。
cta_close_loop
内容看懂之后要有明确行动收口
规则证据
- CTA 强度达到 medium/strong 的样本占比约 49.9%。
- 当前 next_action 高频项:add_proof, scale, keep_testing, make_variations, use_as_template。
执行建议
- 如果视频有证明动作但成交弱,优先检查 CTA 是否讲清楚在哪里买、为什么现在买。
- 折扣、TikTok Shop、评论区引导和链接下方提示最好结合场景自然出现,不要像硬广口号。
visual_asset_reasoning
关键帧不是截图库存,而是画面判断力
规则证据
- 高频画面类型:使用步骤, 开头画面。
- 高频主体:产品。
执行建议
- 优先挑一眼能看懂产品用途、痛点或证明动作的帧做封面候选。
- 如果画面主体是人但产品不清楚,报告建议应偏向补产品近景;如果产品清楚但人不真实,建议偏向补真人生活感。
打法库给这条的额外提醒
- 打法库提示:这条素材可以优先考虑补一个更可视化的证明动作,比如 颜色选择 / 甩头,但要结合当前脚本自然插入,不能硬塞测试镜头。
过泛标签提醒
- 前 3 秒抓手还不够集中:100.0%。出现比例过高,暂时不适合作为区分好坏素材的核心判断,需要后续拆成更细的原因。
- 证明动作不够强:97.2%。出现比例过高,暂时不适合作为区分好坏素材的核心判断,需要后续拆成更细的原因。
- 产品露出足够早:97.2%。出现比例过高,更像基础特征,不宜直接当成强优势,需要和数据表现或画面证据一起判断。
- 真人生活感较强:100.0%。出现比例过高,更像基础特征,不宜直接当成强优势,需要和数据表现或画面证据一起判断。
- 展示路径完整,用户更容易理解产品怎么用:100.0%。出现比例过高,更像基础特征,不宜直接当成强优势,需要和数据表现或画面证据一起判断。
转写、OCR 与音乐补充
默认折叠,方便复核完整口播转写
Go watch this video so that you can see exactly how to take a brand new wig, how I prep my hair, and how I make that lace front look the most natural. That's on what my process is to getting my hair prepped and ready to wear a wig. So I'm gonna show you that process right now, some of my favorite tips and tricks, my favorite wig grip. And then I'm gonna go ahead and show you exactly what I would do to a brand new wig to make her feel more natural for me. Also, a little disclaimer is you do what works best for you. Just because I'm sharing what works best for me doesn't mean it's gonna work best for you. But I always get asked on different tips and tricks, so I'm gonna share those with you guys. I put my hair in two little braids. That's because I still have a good amount of bio hair. I don't want a big lump in the back of my head. So these make it really easy to kind of fold them over and make them a little flatter. I do use the Dream Lover, the extended one. This is by far my favorite wig grip. I actually put it on my forehead. Yes, on my forehead, cause that's gonna help with slippage. And then I move it up. I'm going to pull up my braids. I'm also gonna kind of overlap those braids so it Kind of has a little bit of a stopping point. You guys can see this braid is right there. It's gonna have a little bit of a stopping point to keep it from slipping. I'm going to then fold these over and just tuck these in. And I push this part back until you start. Start to see your hairline right there. And then I'm going to put my wig cap over the top. Why do I put my wig cap over the top? It's the only way I can get my wig cap to stay. And it also protects my bio hair and keeps everything from moving and grooving back there. Keeps it all in order. So now I'm ready to put my wig on. But I have a new wig. I just cut the lace and I wanna show you exactly what I do to get her to look the most natural at the hairline. Alright, I just popped on a wig. I'm going to pull this down. Gonna show you exactly how. I could just leave it like this, but I'm gonna show you exactly how I get this part to look the most natural for me. Moving to the bathroom cause I'm gonna do a little heat styling. So what I'm actually gonna do is first I'm gonna go in and cut a little bit more of this hairline off. This is just gonna be a little bit more natural for me. This is what I Do with all of my wigs until they look the most natural right up there. Now that I've done that, I'm going to give her a part. I want her to stay parted like this. And I also, like, I don't normally wear my hair away from my face like this, so I'm actually gonna pull some of these forward, and I find that it makes it just look a little bit more natural, and also helps hide that lace a little bit more. So I'm gonna put my blow dryer on hot heat, bring it to red, and I'm just gonna pull a chunk like this forward. Okay. And then I'm gonna change it to cold. We're gonna fully cool it right there. See how that just lays a little bit more natural? I'm gonna do the same thing over here. I'm gonna take kind of a chunk like this, pull it forward, change this to hot, and get it cool till it's fully cool. There we go. And I have one last tip and trick thing I'm gonna do is I'm gonna take some of my under eye makeup, and I'm gonna use a really kind of dense eyeshadow brush, and I'm going to just tap this right here on my hairline into that part. That is gonna make her feel a little bit more natural. And sometimes, depending on where my part is, I'll go back and do a little bit more right in here as well. And this just makes that look more like my natural hairline. So hopefully this was helpful. Those are some of the tips and tricks that I do to make my lace fronts look the most natural.
脚本稿整理版
- Go watch this video
- so that you can see exactly how to take a brand new wig,
- how I prep my hair,
- and how I make that lace front look the most natural.
- That's on what my process is to getting my hair prepped
- and ready to wear a wig. So I'm gonna show you that process right now,
- some of my favorite tips and tricks,
- my favorite wig grip. And then
- I'm gonna go ahead and show you
- exactly what I would do to a brand new wig
- to make her feel more natural for me.
- Also, a little disclaimer is you do what works best for you.
- Just because I'm sharing what works best for me
- doesn't mean it's gonna work best for you.
- But I always get asked on different tips and tricks,
- so I'm gonna share those with you guys.
- I put my hair in two little braids.
- That's because I still have a good amount of bio hair.
- I don't want a big lump in the back of my head.
- So these make it really easy to kind of
- fold them over and make them a little flatter.
- I do use the Dream Lover, the extended one.
- This is by far my favorite wig grip.
- I actually put it on my forehead.
- Yes, on my forehead,
- cause that's gonna help with slippage.
- And then I move it up. I'm going to pull up my braids.
- I'm also gonna kind of overlap those braids
- so it Kind of has a little bit of a stopping point.
- You guys can see this braid is right there.
- It's gonna have a little bit of a stopping point
- to keep it from slipping.
- I'm going to then fold these over and just tuck these in.
- And I push this part back until you start.
- Start to see your hairline right there.
- And then I'm going to put my wig cap over the top.
- Why do I put my wig cap over the top?
- It's the only way I can get my wig cap to stay.
- And it also protects my bio hair
- and keeps everything from moving and grooving back there.
- Keeps it all in order. So now I'm ready to put my wig on.
- But I have a new wig. I just cut the lace
- and I wanna show you exactly what I do
- to get her to look the most natural
- at the hairline.
- Alright, I just popped on a wig.
- I'm going to pull this down.
- Gonna show you exactly how.
- I could just leave it like this,
- but I'm gonna show you exactly how I get this part
- to look the most natural for me.
- Moving to the bathroom cause I'm gonna do a little heat styling.
- So what I'm actually gonna do is first
- I'm gonna go in and cut a little bit more of this hairline off.
- This is just gonna be a little bit more natural for me.
- This is what I Do with all of my wigs until they look the most natural
- right up there. Now that I've done that,
- I'm going to give her a part.
- I want her to stay parted like this.
- And I also, like,
- I don't normally wear my hair away from my face like this,
- so I'm actually gonna pull some of these forward,
- and I find that it makes it just look a little bit more natural,
- and also helps hide that lace a little bit more.
- So I'm gonna put my blow dryer on hot heat,
- bring it to red,
- and I'm just gonna pull a chunk like this forward.
- Okay. And then I'm gonna change it to cold.
- We're gonna fully cool it right there.
- See how that just lays a little bit more natural?
- I'm gonna do the same thing over here.
- I'm gonna take kind of a chunk like this,
- pull it forward, change this to hot,
- and get it cool
- till it's fully cool.
- There we go. And I have one last tip and trick
- thing I'm gonna do is I'm gonna take some of my under eye makeup,
- and I'm gonna use a really kind of dense eyeshadow brush,
- and I'm going to just tap this right here on my hairline
- into that part.
- That is gonna make her feel a little bit more natural.
- And sometimes, depending on where my part is,
- I'll go back and do a little bit more right in here as well.
- And this just makes that look more like my natural hairline.
- So hopefully this was helpful.
- Those are some of the tips and tricks that I do
- to make my lace fronts look the most natural.
分段时间轴转写
-
00:00-00:00
Go watch this video
-
00:00-00:03
so that you can see exactly how to take a brand new wig,
-
00:03-00:04
how I prep my hair,
-
00:04-00:07
and how I make that lace front look the most natural.
-
00:07-00:09
That's on what my process is to getting my hair prepped
-
00:09-00:13
and ready to wear a wig. So I'm gonna show you that process right now,
-
00:13-00:14
some of my favorite tips and tricks,
-
00:14-00:16
my favorite wig grip. And then
-
00:16-00:18
I'm gonna go ahead and show you
-
00:18-00:20
exactly what I would do to a brand new wig
-
00:20-00:21
to make her feel more natural for me.
-
00:21-00:24
Also, a little disclaimer is you do what works best for you.
-
00:24-00:26
Just because I'm sharing what works best for me
-
00:26-00:27
doesn't mean it's gonna work best for you.
-
00:27-00:29
But I always get asked on different tips and tricks,
-
00:29-00:31
so I'm gonna share those with you guys.
-
00:31-00:32
I put my hair in two little braids.
-
00:32-00:34
That's because I still have a good amount of bio hair.
-
00:34-00:36
I don't want a big lump in the back of my head.
-
00:36-00:38
So these make it really easy to kind of
-
00:38-00:40
fold them over and make them a little flatter.
-
00:40-00:42
I do use the Dream Lover, the extended one.
-
00:42-00:44
This is by far my favorite wig grip.
-
00:44-00:46
I actually put it on my forehead.
-
00:46-00:46
Yes, on my forehead,
-
00:46-00:48
cause that's gonna help with slippage.
-
00:48-00:51
And then I move it up. I'm going to pull up my braids.
-
00:51-00:53
I'm also gonna kind of overlap those braids
-
00:53-00:55
so it Kind of has a little bit of a stopping point.
-
00:56-00:58
You guys can see this braid is right there.
-
00:58-01:01
It's gonna have a little bit of a stopping point
-
01:01-01:02
to keep it from slipping.
-
01:02-01:06
I'm going to then fold these over and just tuck these in.
-
01:06-01:08
And I push this part back until you start.
-
01:08-01:10
Start to see your hairline right there.
-
01:10-01:13
And then I'm going to put my wig cap over the top.
-
01:13-01:14
Why do I put my wig cap over the top?
-
01:14-01:16
It's the only way I can get my wig cap to stay.
-
01:16-01:18
And it also protects my bio hair
-
01:18-01:21
and keeps everything from moving and grooving back there.
-
01:21-01:25
Keeps it all in order. So now I'm ready to put my wig on.
-
01:25-01:27
But I have a new wig. I just cut the lace
-
01:27-01:28
and I wanna show you exactly what I do
-
01:28-01:30
to get her to look the most natural
-
01:30-01:31
at the hairline.
-
01:32-01:33
Alright, I just popped on a wig.
-
01:33-01:35
I'm going to pull this down.
-
01:35-01:37
Gonna show you exactly how.
-
01:37-01:38
I could just leave it like this,
-
01:38-01:40
but I'm gonna show you exactly how I get this part
-
01:40-01:42
to look the most natural for me.
-
01:42-01:44
Moving to the bathroom cause I'm gonna do a little heat styling.
-
01:44-01:45
So what I'm actually gonna do is first
-
01:45-01:48
I'm gonna go in and cut a little bit more of this hairline off.
-
01:48-01:51
This is just gonna be a little bit more natural for me.
-
01:51-01:54
This is what I Do with all of my wigs until they look the most natural
-
01:54-01:56
right up there. Now that I've done that,
-
01:56-01:58
I'm going to give her a part.
-
01:58-01:59
I want her to stay parted like this.
-
01:59-02:00
And I also, like,
-
02:00-02:02
I don't normally wear my hair away from my face like this,
-
02:02-02:05
so I'm actually gonna pull some of these forward,
-
02:05-02:07
and I find that it makes it just look a little bit more natural,
-
02:07-02:08
and also helps hide that lace a little bit more.
-
02:08-02:10
So I'm gonna put my blow dryer on hot heat,
-
02:11-02:12
bring it to red,
-
02:13-02:15
and I'm just gonna pull a chunk like this forward.
-
02:18-02:21
Okay. And then I'm gonna change it to cold.
-
02:21-02:24
We're gonna fully cool it right there.
-
02:28-02:30
See how that just lays a little bit more natural?
-
02:30-02:32
I'm gonna do the same thing over here.
-
02:32-02:34
I'm gonna take kind of a chunk like this,
-
02:34-02:36
pull it forward, change this to hot,
-
02:42-02:43
and get it cool
-
02:45-02:47
till it's fully cool.
-
02:52-02:54
There we go. And I have one last tip and trick
-
02:54-02:56
thing I'm gonna do is I'm gonna take some of my under eye makeup,
-
02:56-03:00
and I'm gonna use a really kind of dense eyeshadow brush,
-
03:00-03:03
and I'm going to just tap this right here on my hairline
-
03:06-03:07
into that part.
-
03:10-03:12
That is gonna make her feel a little bit more natural.
-
03:12-03:14
And sometimes, depending on where my part is,
-
03:14-03:18
I'll go back and do a little bit more right in here as well.
-
03:22-03:25
And this just makes that look more like my natural hairline.
-
03:25-03:26
So hopefully this was helpful.
-
03:26-03:28
Those are some of the tips and tricks that I do
-
03:28-03:30
to make my lace fronts look the most natural.
OCR 字幕汇总
暂无 OCR 字幕。
音乐分析
- 暂无音乐分析结果。
短期与长期学习系统预留
- 后续会根据这条素材的分析时间 2026-07-18 07:00:07 UTC 关联最近热点与高转化素材,补一层“本周市场提醒”。
- 后续会把已分析素材沉淀进长期知识库,用于新素材与历史优秀素材的相似度对比、复剪参考与团队教学。